Hallberg Rassy Rasmus 35

Hallberg Rassy Rasmus 35
An Old Classic

Tuesday, May 29, 2012

Hardtop/Windows Complete, Cutlass Bearing Installed, Tiller Handle Installed, and Anchor System Complete

I replaced the cutlass bearing but changed out the shaft diameter since I wanted to change from the original 30mm shaft to a 1 1/8 inch diameter shaft.  The outside diameter of the cutlass bearing is 1 3/4 inches, which surprised me considering it was built in the land of metrics.  Pic below:


I added an aluminum plate to the front of the anchor platform to keep anchors off of the wood.  I notched the plate so the edges of the fortress anchor could fit in to hold it in place. Pic below:


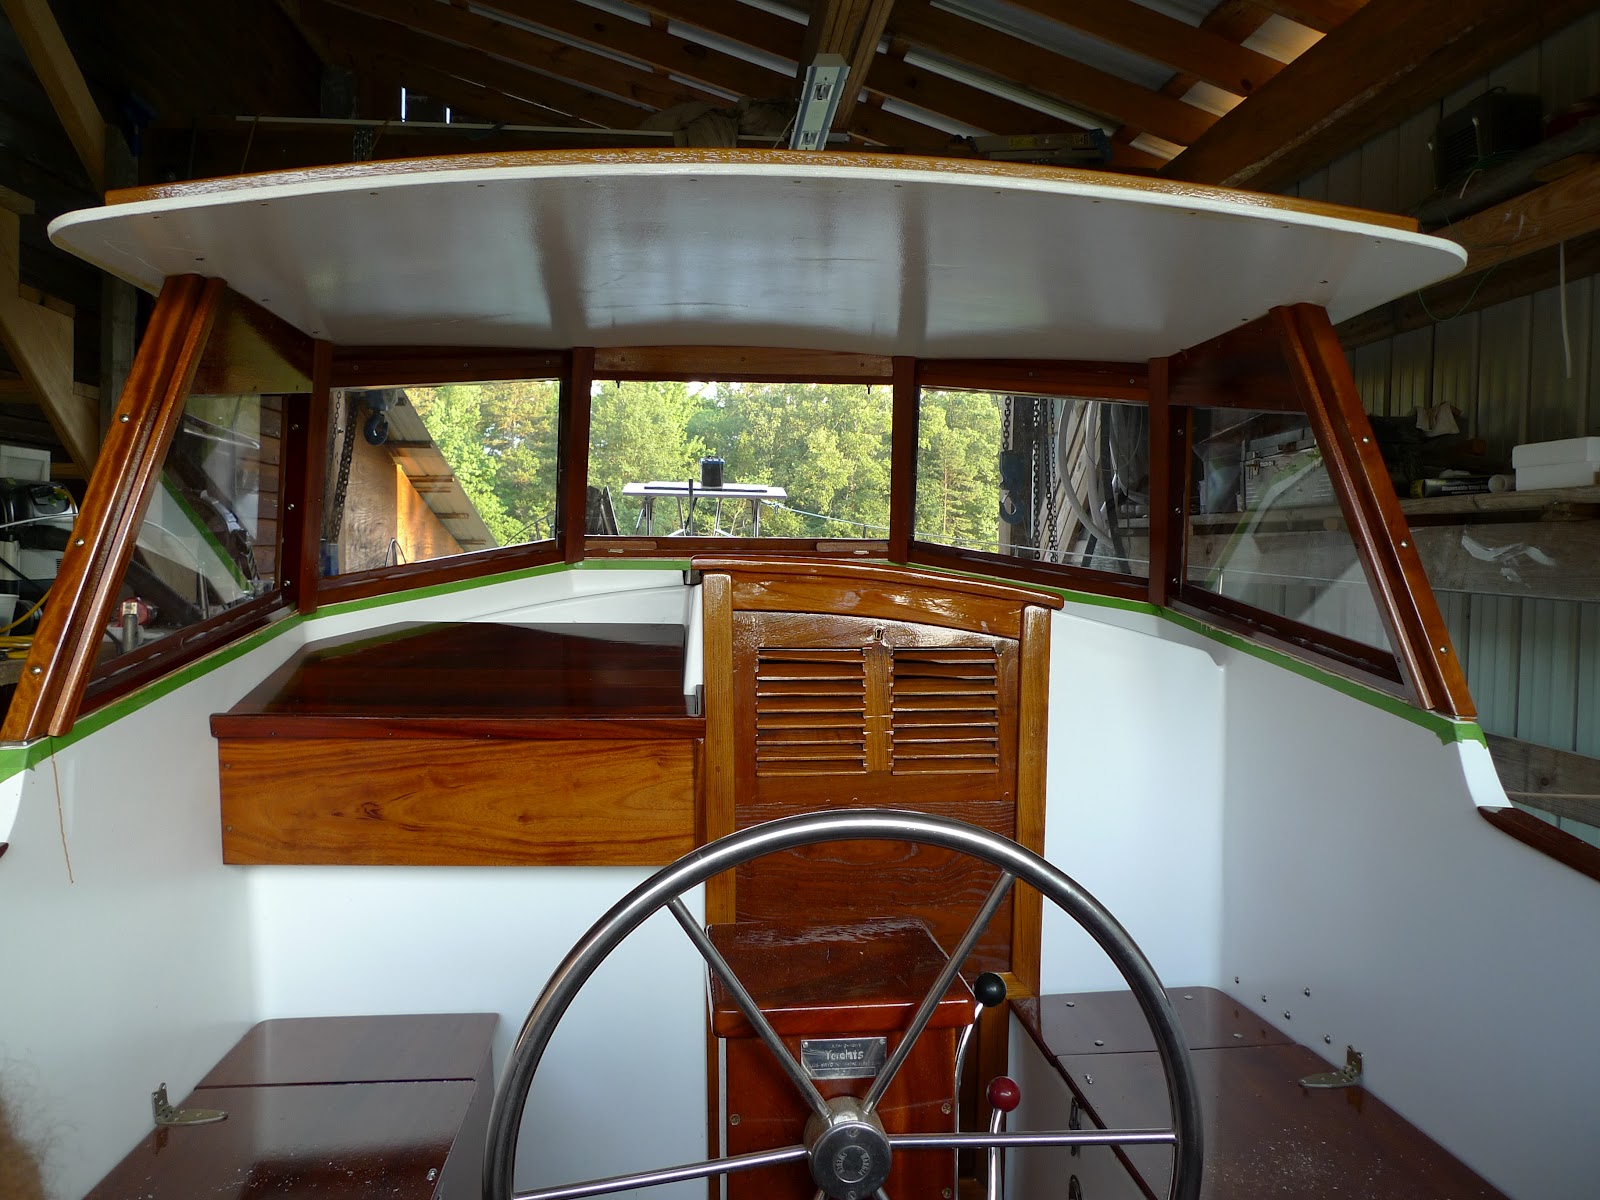
Here is the front view of the hardtop and windshield.  I used 1/4 inch thick lexan for the windows and trimmed them in teak and a little mulberry.  Mulberry is very rot resistant and looks almost exactly like teak. I used silicone caulk to seal everything. Pic Below:


Here is the installed bow skene chock.  They are nice Suncor hardware. Pic Below:


Here is the installed cherry tiller handle I milled out of a cherry log that I got from my neighbors yard.  It had a natural curve in the trunk that allowed me to follow the grain to make the nice bend in the handle. Pic Below:


Looking forward and above at the hardtop.  I added teak handles and trim on the aft end to keep water from dripping over the edge.  The hardtop is finally completed.  It was a lot of work but I think it turned out nice.  All I have left now is installing the engine and rigging the boat at dockside. The engine, a Beta Marine 38,  is ordered and should be here in a month.  The sails, from Mack sails,  are ordered and should be here soon too.  I should have the boat in the water this Fall is all goes well.


Saturday, May 19, 2012

Holding tank setup on Rasmus

Hi all,
This month it became law in Canada to have a holding tank in all waters.  As a result, I have to install a holding tank ASAP.

I'm looking for advice - so I will learn from others - and get it right the first time.  Anything you can share - diagrams, photos, commentary would be most appreciated.

Thanks in advance

Dave DeWolfe
discoverysailing.com
Rasmus #330

Sunday, May 6, 2012

Cape Horn Self Steer Installed, New Batteries, and New Varnish

I received the Cape Horn Windvane Self Steering gear about a week ago and took the time to install it last week.  I ordered the outboard model and it was fairly easy to install.  It took me two days working alone and it looks to be a pretty good installation.
I also ordered a tiller head from the CapeHorn Company and it fit perfectly and will enable me to steer with either the windvane or a tiller handle which I can easily bolt onto the tiller head.
I also added a teak rack in front of the windshield just in case I needed an extra spot to hold a solar panel or other gear I might lash down on top.
I had time to put another coat of varnish on the interior.  I will probably apply one more good coat and call it good.

I also installed my two Lifeline 4D AGM batteries giving me about 450 amp/hours of power for cold drinks on those hot days. I thought I got a real good price from BD Batteries out of Denver.  They also shipped free! 

I am ordering the engine within the month and hopefully get her in the water by no later than September.